


-
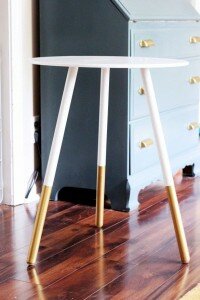
Make this bath caddy
15 May 2013
Make this bath caddy on your own!
Quick project guide
Hard labour 4/10
Skill level 4/10 (requires use of power tools, fine measuring)
Time needed About 2 hours (excluding drying time)
Finished size 1200(L) x 250(W) x 350mm(H)
Do it yourself for under R500Project notes
• The bath shown here determined the measurements of our caddy.
• Aluminium is often sold in 6m lengths; you will need about 18m (3 x 6m lengths) to give you about 70 x250mm lengths.
• Have your supplier cut the aluminium into 250mm lengths to save time.Shopping list
• three lengths of 1800 x 44 x 22mm meranti cut to: two 1000mm; two 256mm; two 250mm; two 200mm; two 206mm (joining pieces)
• three 6m x 6mm aluminium rods cut to: ±70 x 250mm lengths
Other items
• ±twelve 50mm chipboard screws
• waterproof wood glue
• varnishConstruct the frame
Diagram
1 Measure 22mm from the end and mark a line across the width of one of the 1000mm pieces. Mark another 22mm-wide band 80mm from the other end (use the joining pieces here). Use an offcut piece to mark 22mm intervals along the remaining length. Do the same with a 256, 250 and 200mm length. Draw a line 15mm from the edge along the lengths.
2 Clamp each pair in turn (with the marked pieces on top) to the work surface, ensuring that the ends and edges are flush. Use the 6mm drill bit to drill holes through both pieces at these marks. Drill vertically through both planks so that the holes will coincide perfectly; a drill press will be invaluable for this step. Place an off-cut piece under the planks so that the wood does not splinter at the bottom of the holes.
TIP When using any drill bits on more solid timber, stop drilling periodically to remove any material clogging the bit.
3 Use a combination countersink drill bit (or 2.5mm drill followed by a regular countersink drill bit) to drill two countersunk pilot holes midway between the sets of lines drawn in step 1. Do this at the other end (the 22mm-wide band 80mm from the other end) and on the second plank.
4 Apply waterproof wood glue to the joins before screwing the back of the framework together using the 50mm chipboard screws. Use a tri-square or corner clamp to ensure that the corners are perpendicular.
5 Glue the remaining joints with waterproof wood glue before screwing them together using the 50mm chipboard screws. Drill pilot holes into the ‘top’ edge of the 1000mm pieces and the 250mm sections when joining the rest of the frame.
6 Use a hacksaw to cut the 6mm aluminium rod into 250mm sections. Clamp it firmly in place in a vice when cutting.
7 Now place the aluminium lengths into the holes and use a hammer to tap them home. Use a belt sander to sand any protruding pieces flush with the surface.
8 Then sand all surfaces and the edges lightly. Finish with two coats of clear varnish.


-

Other Posts in DIY
-
DIY
A Concrete Plan
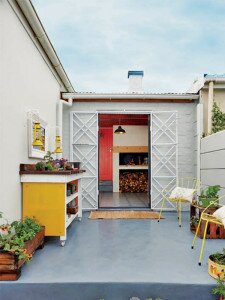
Embarrassed by the peeling paint on your stoep floor? We show you how to give it a quick revamp
Other Posts in Home
-
Décor
Off The Beaten Path

Next time you’re on the N1, take a detour and pay a visit to a charming Art Deco hotel with old-world charm, top-class food and a paradise garden
-
Décor
A Brooklyn Apartment You’ve Got To See

Blogger Joanna Goddard shows off her new Brooklyn apartment
-
Décor
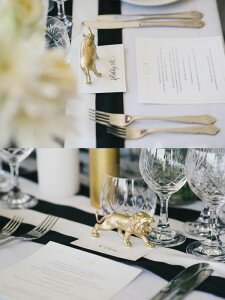
Woolworths Gets Easter Right

One of our favourite stores has the cutest items for Easter celebrations.
Shop with DAILYFIX


-

Dailyfix copyright Media24.
Dailyfix is the new online home of Fairlady, Home and Ideas magazines.
Read more about us here.
Made by OnNet.
Sitemap